This is a step-by-step guide provided for those people who want to learn how to install windows vista by themselves, learning how to do this will save you the money you spend to pay a tech guy.
A clean installation is always good if you want to get rid of those nasty viruses that lurks your PC or just want to have a fresh start.
Note: Before you try install vista, kindly check Windows Vista System Requirements to check if your computer meets the necessary system requirements for your version of Windows Vista.
Note: Remember to have your computers Driver CD ready and your Windows Vista Product Key handy. In case that you do not have the Windows Vista drivers for all your computers hardware, try to download them first and have them burned into a blank disk before you proceed with the rest of this guide. Also, do not forget to back-up your important files on your C: drive.
Windows Vista DVD is bootable. Check your computer if you have First Boot device set to CD-ROM / DVD- ROM, by default most computers are already set do this. But just in case it’s not set to boot from CD-ROM or DVD-ROM at boot, try to search over the internet or consult your computers manual on how to set the First boot device to cd-rom or dvd-rom drive.
If you have already set
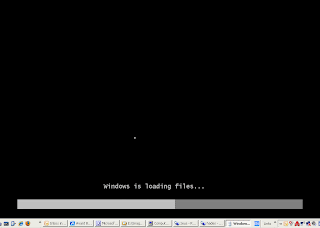
Step 1 – Place the Windows Vista DVD in to your computers DVD-ROM drive and restart your PC. Windows Vista will automatically load set-up and you will be seeing the screen below.
Step 2 – In the next screen you will see a window that allows you to setup the language, Time and Currency format and the type of keyboard localization you want to use. Choose the Language you want to use and the Time and Currency format. You can leave the Keyboard part as is, as it works with most keyboards in the US 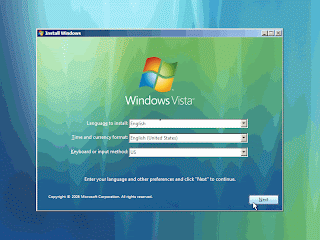
Step 3 - On the next screen you will see a window that allows you to choose between a new Installation of Windows Vista and Repairing an existing Windows Vista Installation. For this guide, we will use new Vista installation. So, go ahead and click on Install Now. 
Step 4 – Now fill in the your Windows Vista Product key, make sure that you type them correctly as they appear at the back of your Windows Vista DVD case.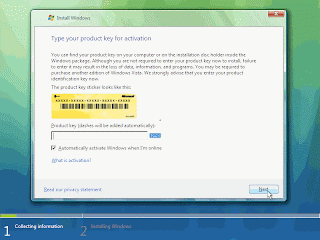
Step 5 – In the event that you do not have your product key. Just click on Next, and choose the version of Windows Vista that you have, and then click Next.
Note: Although you may be able to select any version of Windows Vista from the list shown, It is never a good idea to choose one that is not the same as the version stated at the on your Windows Vista DVD case. 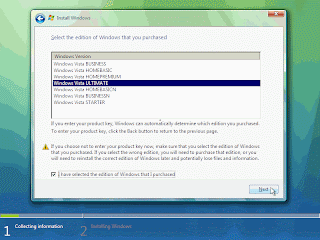
Step 6 – In this part you have to put a check [ / ] on the small white box beside “I accept the license terms” and then click Next.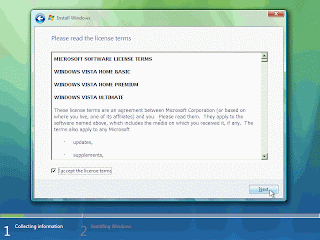
Window Vista Installation Part 2
to see the rest of the guide tutorial


0 comments
Post a Comment